Happy Palm Sunday!

IMG_6542

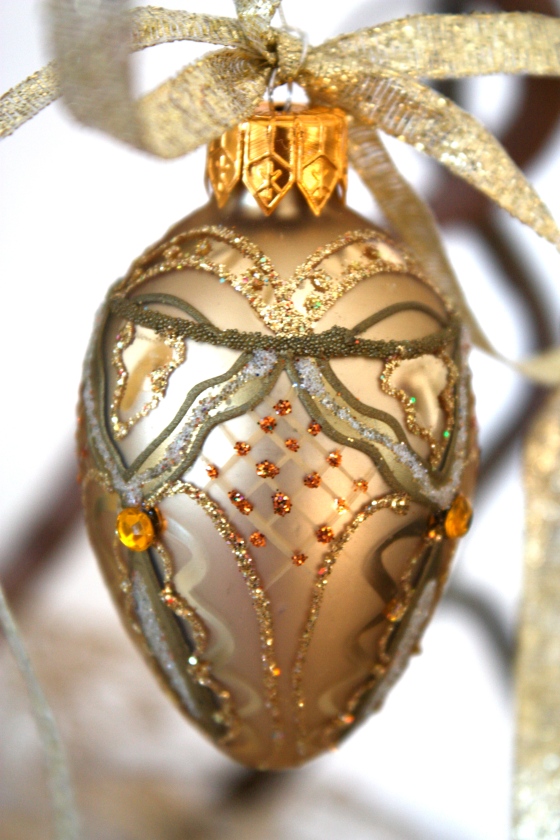
Easter is my favorite holiday because of the weight it carries for me spiritually. So I always look forward to being creative for this holiday and making the most of this season. Last year I did the traditional painted eggs with a little extra glam. Click here to view. This year I had a little less time at hand, so I took an easier route. But I hope it’s just as “glam.” I simply repurposed some oval shaped Christmas ornaments as eggs and them hung ’em on branches. If your eggs are plain, all you need to make the shine is: glue, glitter and gems. That would be 3G!
IMG_6759

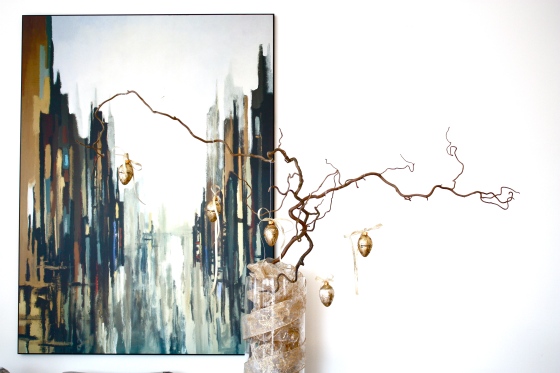
A picture of the gems hanging on Norwegian “troll branches.”
IMG_6753

My favorite egg has a cross, which brings me to the hart of Easter: “Surely he has borne our griefs and carried our sorrows; yet we esteemed him stricken, smitten by God, and afflicted. But he was pierced for our transgressions; he was crushed for our iniquities; upon him was the chastisement that brought us peace, and with his wounds we are healed.” (Isaiah 53:4-5, ESV)

IMG_6763

With Love,

Untitled

Renewing old frames, and just waiting…

Hi Everyone,
My due date for this pregnancy is within hours reach, so I’m eagerly waiting for my little angel to arrive. At this point the house could not possibly be any cleaner (I have a bad case of nesting going on), the bags are packed, and the cupboards are stuffed with dippers, wipes, and creams that any would tackle any kind of baby rash. That said, my home projects and blogging have been on the back burner lately 😉
However, I do have a little nugget to share: a project I did a while back when we were living in our little desert casa in Arizona. If you have any old picture frames lying around that could use a little TLC, this is an easy project. All it takes is a couple boxes of spray paint, maybe some old jewelry, gold leaf paper, a little corner of beautiful textile, and viola!
Steps Taken:
1. I started by cleaning the frames before I sprayed them with a sea green paint. Then I applied gold leaves. The gold leaves stick easily to the painted surface
 2. After the paint dried I applied a vintage border by decoupage, and some gems to its surface.
3. Lastly, I used a thick fabric (textile) as a backdrop in the frame instead of inserting pictures.
The pictures aren’t that fab because I used my iPhone. (If you want a clearer picture let me know and I’ll send one to you.)

Love,

New Centerpiece Idea for Dining Room Table

Flowers are spectacular. They’re fun and they add color to any space of your choosing. But I think they look the best when featured as a centerpiece on a dining room table. That’s why I love to fill my tall, cylinder glass vase with an assortment personal favorites such as tulips, classic roses, or spectacular orange lilies like the ones posted above. The downside: the dent they make in my wallet and their short lives (one week tops!). This made me think of other things I could fill my vase with that would be just as eye-catching and fun as my flowers. I think I found something that won’t decay after a few days in the limelight. Hurra!

One Sunday afternoon my hubby and I were enjoying lunch with a couple who just bought a fish tank. As they were telling us about their new roommates (little fishes), one particular roommate somehow managed to swim its way into my memory box. The fish, which now lives in my brain, is not only eye-catching but requires as little maintenance as a beautiful bouquet of flowers. So, who is this little booger? It’s the Japanese Fighting Fish, of course!

The vibrant purple and maroon colors on this fish compliment the glass crystals that my glass cylinder already possesses. And the good news is that I only need one fish to keep it simple and interesting. Besides, if I add another, there will be war! Further, this fish enjoys swimming up and down so it’s a win-win. Think about it: you provide a vertical swimming pool for your dining table “star” and a little entertainment for your guests. Luckily, Norway’s larges fish store is only a five minute walk away from where we live. Let me know what you think. Is this a go or a no-go? (Below is a “bottle” version of what I have in mind. I will be using a tall vase.)

Always with love,

A Saturday DIY

After a typical outing downtown of walking the streets in Oslo, drinking coffee, and munching on pastries, I  found a  new changing pad for my super Nova (baby’s name). It was a steal.

The only downside was that it had no hemp for hanging purposes. So, why am I hanging the pad? Simply put, our place is so small that we don’t have a separate bedroom for the baby, and I had to create a changing station in the bathroom instead. Needless to say, I would like the bathroom to look appealing to guests, and still be functional for everyday living!

What did I do?


1. I took an old neckless, made a loop, and sewed it to the chaining pad.

2. For looks I added an ornament, and hung the changing pad on the wall!

Real simple, real fun.. Feel free to share with me your own ideas!


Love,

Beautifying the ordinary

As usual, I was shopping for groceries after work and took my obligatory “exited-expecting-mom-stroll” down the baby isle. While I was looking at binkies for the millionth time, I reached the same disappointing conclusion as always: that I needed to go to a expensive boutique to get the ones with a little personality (that does not include Disney or Dora the Explora)!

I found myself staring at a couple of neutral pacifiers which   promised that 1.) they had the perfect nub for a little one to suck on (only in natural and good materials of course) and, 2.) with a breathable plastic rim, which is much better for sensitive skin. Very impressive I must say, but the only drawback was that those binkies’ designs were making me yawn on the inside. sigh.

Then the thought hit me. It would only take a couple crystals, some half-pearls, strong glue, and some stunning ribbons to outshine the contenders. Easy.


1. It’s helpful to create your design before you start gluing on your gems. Use a strong glue that  will make it impossible for a child to loosen the crystals.

2. Apply your crystals with a  pair of tweezers.

To view more images of binky bling visit the Gallery

Hope it inspires,


Easter Fun

This year I wanted to step it up a notch and make my Easter eggs nicer than your average Joe’s. The idea was born as I imagined my eggs looking like oversized dinner party earrings. In my mind I went on a journey making a mix of hand-painted, dotted pink, and gold-leafed distressed looking eggs; both batches bejeweled with antique gems, water pearls, and faded pink stones (all real off course!).

No really, it was an inexpensive and fun way to decorate, and I hope it generates more beautiful ideas for my favorite holiday — Easter!

helpful tips:

1. Go outside and find your green! Here in Oslo, the trees are budding and the colors are radiant.

2. Poke your eggs with a needle at both ends, blow the content of the egg out, and then whip up a big omelet for your family!

3. Paint your eggs with a base color before you add your design (unless you are using watercolors). While you let the base dry, you can play with ideas on a separate piece of paper.

4. For my pink eggs I used quality acrylic paint and a color-wheel to help me coordinate my pallette. I dotted the eggs with a toothpick.

5. Tying it all together was simple; I threaded everything on some beautiful yellow straw, resembling cute little fox tails. Lastly, I hung my oversized earrings on branches like it was Christmas!

For more images visit the image Gallery!

Happy Easter,