A Saturday DIY

After a typical outing downtown of walking the streets in Oslo, drinking coffee, and munching on pastries, I  found a  new changing pad for my super Nova (baby’s name). It was a steal.

The only downside was that it had no hemp for hanging purposes. So, why am I hanging the pad? Simply put, our place is so small that we don’t have a separate bedroom for the baby, and I had to create a changing station in the bathroom instead. Needless to say, I would like the bathroom to look appealing to guests, and still be functional for everyday living!

What did I do?


1. I took an old neckless, made a loop, and sewed it to the chaining pad.

2. For looks I added an ornament, and hung the changing pad on the wall!

Real simple, real fun.. Feel free to share with me your own ideas!


Love,

Interior Convention


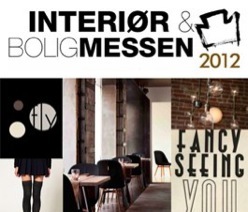
I’m exited to join the yearly home & interior convention in Bergen this upcoming September. I am sure it’s  going to be a blast. Thought I’d put up a link to their blog so that you home decorating enthusiasts would  not miss out.

When and Where is this going to happen?

Bergen, Grieghallen

September 28-29, 2012

I’m looking forward to making it a weekend of fun design and inspiring, new ideas. Weegies in Oslo, you are welcome to join me!

Link to the event

Love,


Beautifying the ordinary

As usual, I was shopping for groceries after work and took my obligatory “exited-expecting-mom-stroll” down the baby isle. While I was looking at binkies for the millionth time, I reached the same disappointing conclusion as always: that I needed to go to a expensive boutique to get the ones with a little personality (that does not include Disney or Dora the Explora)!

I found myself staring at a couple of neutral pacifiers which   promised that 1.) they had the perfect nub for a little one to suck on (only in natural and good materials of course) and, 2.) with a breathable plastic rim, which is much better for sensitive skin. Very impressive I must say, but the only drawback was that those binkies’ designs were making me yawn on the inside. sigh.

Then the thought hit me. It would only take a couple crystals, some half-pearls, strong glue, and some stunning ribbons to outshine the contenders. Easy.


1. It’s helpful to create your design before you start gluing on your gems. Use a strong glue that  will make it impossible for a child to loosen the crystals.

2. Apply your crystals with a  pair of tweezers.

To view more images of binky bling visit the Gallery

Hope it inspires,


About to pop – cake pops!

I’m 30 weeks pregnant, and feel like I’m about to pop! What would be more fitting than for me to make a batch of cake pops? With ten more weeks to go (not that anyone’s counting), it’s relieving to focus my brain on various projects so that time moves a little faster. So, I took action and designed my pops to look like little pregnant ladies! Say “Hello” to my little fat friends!

Three simple steps:

1. You simply bake a cake, let it cool, and crumble it up! Then you mix it with the delicious frosting and roll your little bellies (no, I didn’t mean belly dancing)!

2. Add a lolli-pop sick to your belly (you can get these at Michael’s, Hobby Lobby, or for Weegies, at Panduro). Then simply allow them to harden in the freezer before you proceed to the next step.

3. Finally, melt your your chocolate, dip, and decorate!


"Ooh ooh ooh, ooh ooh ooh; All the pregnant ladies, all the pregnant ladies!"

For more images visit the Gallery

Enjoy you pops!


Easter Fun

This year I wanted to step it up a notch and make my Easter eggs nicer than your average Joe’s. The idea was born as I imagined my eggs looking like oversized dinner party earrings. In my mind I went on a journey making a mix of hand-painted, dotted pink, and gold-leafed distressed looking eggs; both batches bejeweled with antique gems, water pearls, and faded pink stones (all real off course!).

No really, it was an inexpensive and fun way to decorate, and I hope it generates more beautiful ideas for my favorite holiday — Easter!

helpful tips:

1. Go outside and find your green! Here in Oslo, the trees are budding and the colors are radiant.

2. Poke your eggs with a needle at both ends, blow the content of the egg out, and then whip up a big omelet for your family!

3. Paint your eggs with a base color before you add your design (unless you are using watercolors). While you let the base dry, you can play with ideas on a separate piece of paper.

4. For my pink eggs I used quality acrylic paint and a color-wheel to help me coordinate my pallette. I dotted the eggs with a toothpick.

5. Tying it all together was simple; I threaded everything on some beautiful yellow straw, resembling cute little fox tails. Lastly, I hung my oversized earrings on branches like it was Christmas!

For more images visit the image Gallery!

Happy Easter,